
HOW TO USE MAIL MERGE
To use Mail Merge:
- Select
the Mailings on the Ribbon.
- Select
the Start Mail Merge command.
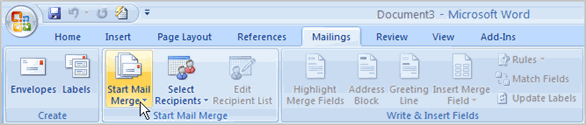
- Select
Step by Step Mail Merge Wizard.
The Mail Merge task pane appears and will guide you through
the six main steps to complete a merge. You will have several decisions
to make during the process. The following is an example of how to create a form
letter and merge the letter with a data list.
Steps 1-3
- Choose
the type of document you want to create. In this example, select Letters.
- Click
Next: Starting document to move to Step 2.
- Select
Use the current document.
- Click
Next: Select recipients to move to Step 3.
- Select
the Type a new list button.
- Click
Create to create a data source. The New Address List dialog
box appears.
- Click Customize in the dialog box. The
Customize Address List dialog box appears.
- Select any field you do not need, and click Delete.
- Click Yes to confirm that you want to delete
the field.
- Continue to delete any unnecessary fields.
- Click Add. The Add Field dialog box appears.
- Enter the new field name.
- Click OK.
- Continue to add any fields necessary.
- Click OK to close the Customize Address List
dialog box.
To customize the new address list:

- Enter
the necessary data in the New Address List dialog box.
- Click
New Entry to enter another record.
- Click
Close when you have entered all of your data records.
- Enter
the file name you want to save the data list as.
- Choose
the location where you want to save the file.
- Click
Save. The Mail Merge Recipients dialog box appears and displays all
of the data records in the list.
- Confirm
that the data list is correct, and click OK.
- Click
Next:Write your letter to move to Step 4.
Steps 4-6
- Write
a letter in the current Word document, or use an open existing document.
To insert recipient
data from the list:
- Place the insertion point in the document where you
want the information to appear.
- Select Address block, Greeting line, or Electronic
postage from the task pane. A dialog box with options will appear based
on your selection.
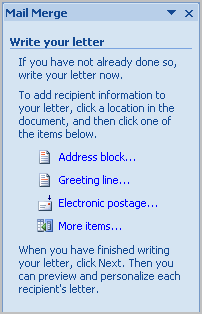
OR
- Select More Items. The Insert Merge Field dialog box
will appear.
- Select the field you want to insert in the document.
- Click Insert. Notice that a placeholder appears
where information from the data record will eventually appear.
- Repeat these steps each time you need to enter
information from your data record.
- Click
Next: Preview your letters in the task pane once you have completed
your letter.
- Preview
the letters to make sure the information from the data record appears
correctly in the letter.
- Click
Next: Complete the merge.
- Click
Print to print the letters.
- Click
All.
- Click
OK in the Merge to Printer dialog box.
- Click
OK to send the letters to the printer.
The Mail Merge Wizard allows you to complete the merge
process in a variety of ways. The best way to learn how to use the
different functions in Mail Merge is to try to develop several of the different
documents—letters, labels, and envelopes—using the different types of data
sources.
No comments:
Post a Comment